Pressure fermenting has become more and more popular over the years, with increasing numbers of systems becoming available, catering to all budgets. But what exactly is pressure fermenting? Why do it, and how?
Why Pressure Ferment?
Pressure fermenting comes with many advantages, but also a few disadvantages. The question is: is it worth it? Like all homebrewing techniques, it has to work for you. Every brewer usually has limitations to their setup - space, budget and time are all important factors for our customers.
The more you explore the wonderful variety of yeasts that are now available on the market, the more you have to think about your fermenting temperatures. Keeping a constant temp during fermentation is an important part. Sometimes this can be trickier than you think, especially if the temp is lower than the ambient room temperature. I know that in the UK this is sadly pretty low, but even in our cellar at home this can rise above 18°C during the day (ideal for an IPA) but drops to around 12°C at night (ideal for lager). I tend to struggle more with keeping my brew cool than warm. Yes, there are solutions for this - obvious ones such as using a fridge as a fermentation chamber, or getting a glycol chiller. But I’m limited on space and my fridge is used for conditioning and serving, and glycol chillers are slightly out of my budget! This is where a pressure fermenter is ideal.
Pro #1: Higher Ferm Temps.
With pressure fermenting you can ferment your wort at higher temps than normal. I’ve recently brewed a lager at 19-20°C hitting my FG in around 3 days. Meaning, I can keep a balanced temp with very little external help. Which leads me nicely onto…
Pro #2: Faster Ferm times.
Three days to ferment a lager is much quicker than the 10-14 days it usually takes at 12-14°C. I can imagine this is not an issue for most, but I can be an impatient boy. I also have a large turnaround of beer so this definitely helps with our production line at MASHED Community Brewery in Aberystwyth.
I’ve been fermenting with WHC Lab’s latest yeast ‘High Voltage’, a yeast which can handle anything from a lager to a stout - it’s a true game changer with amazing results. This yeast ferments out at around 31-35°C, so you can imagine that under pressure this yeast really speeds along and can ferment out in 48 hours.
Pro #3: Closed Transfer.
Due the nature of pressure fermenting, the equipment available on the market usually makes oxygen-free closed transfers a lot easier. Not something I tend to do much, but I know this can be important to some. My preferred method is to drop the wort into the fermenter to oxygenate the wort then purge the tank with CO2 before sealing. A technique that one of my favourite breweries advised.
Pro # 4: Less Off Flavours
Pressure fermenting can also improve and/or reduce off flavours in the beer. Reducing ester production and other yeast-developed impurities, allowing for a cleaner fermentation.
Pro #5: Ready Carbonated
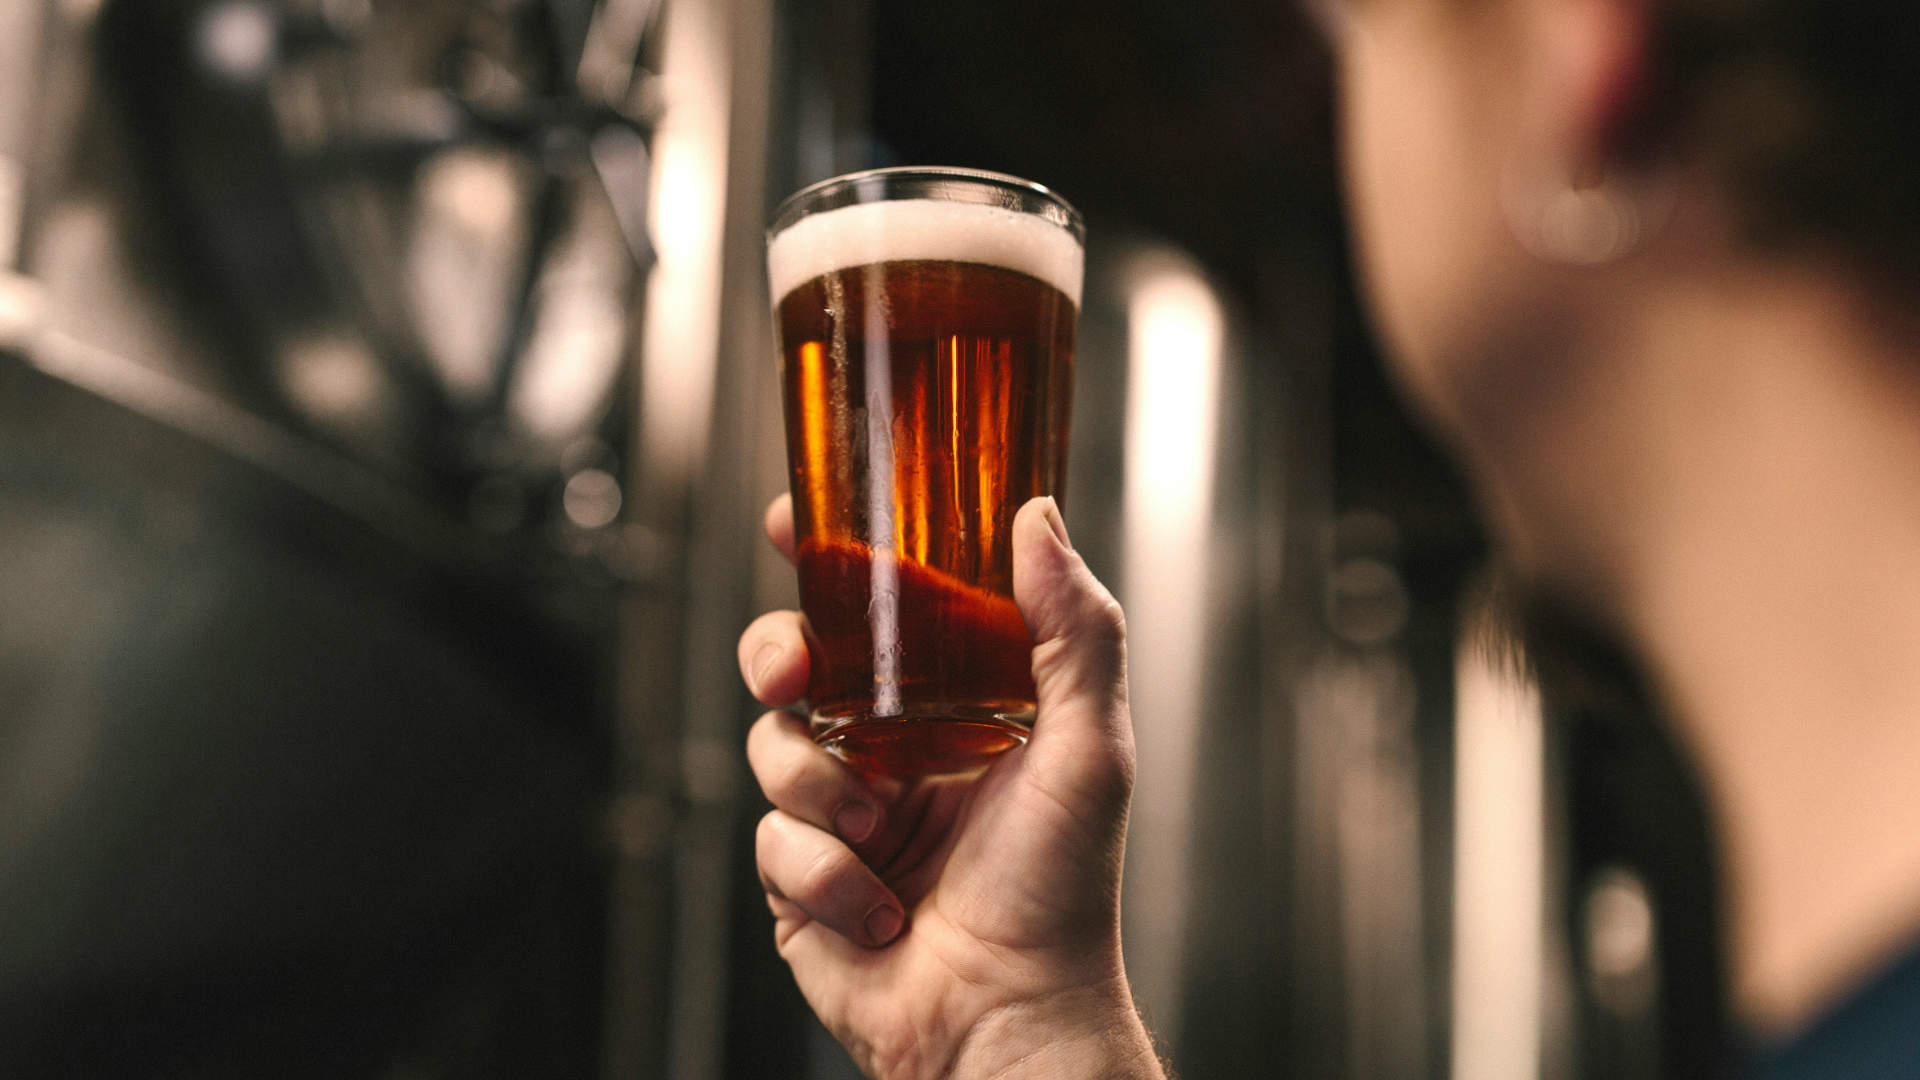
When you pressure ferment, your beer is already carbonated and ready to be transferred to your condition kegs / bottles.
The Cons
After pressure fermenting for a while now, I’ve only experienced a couple of issues. Dry hopping is a pain; there are ways around it but these can be expensive, and some vessels only allow you to drop hops directly into your wort without any way of using a hop bag or spider.
Also, taking your gravity readings has to be done manually. I use a stainless steel fermenting tank and I find that wifi-connected devices don’t transmit a signal from inside the tank. The first time I tried to use one during a pressure ferment, the device actually came apart. I made sure I screwed it up securely, but after emptying the tank I found the device at the bottom completely disassembled. (If anyone knows a way round this issue please get in touch: gareth@darkfarm.co.uk or on social media @darkfarmhops)
How to Pressure Ferment
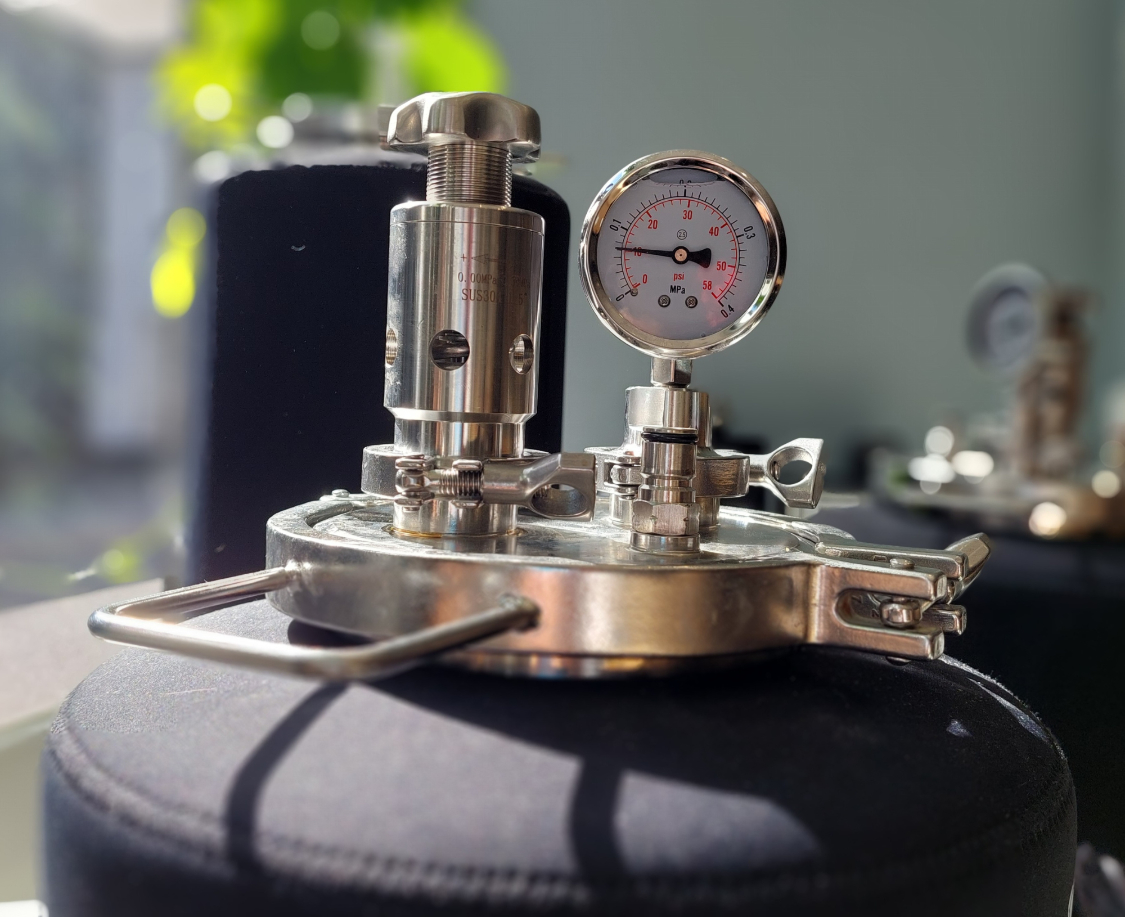
Pressure fermenting is achieved by, you guessed it, pressurising your fermentation vessel. I tend to pressurise to around 15psi. Pressurising any higher can overly stress the yeast, so I find this works best. Again, this leads on to another great advantage: it doesn’t matter if you cold crash or not, once fermentation is done, the beer will now happily sit at around 15psi.
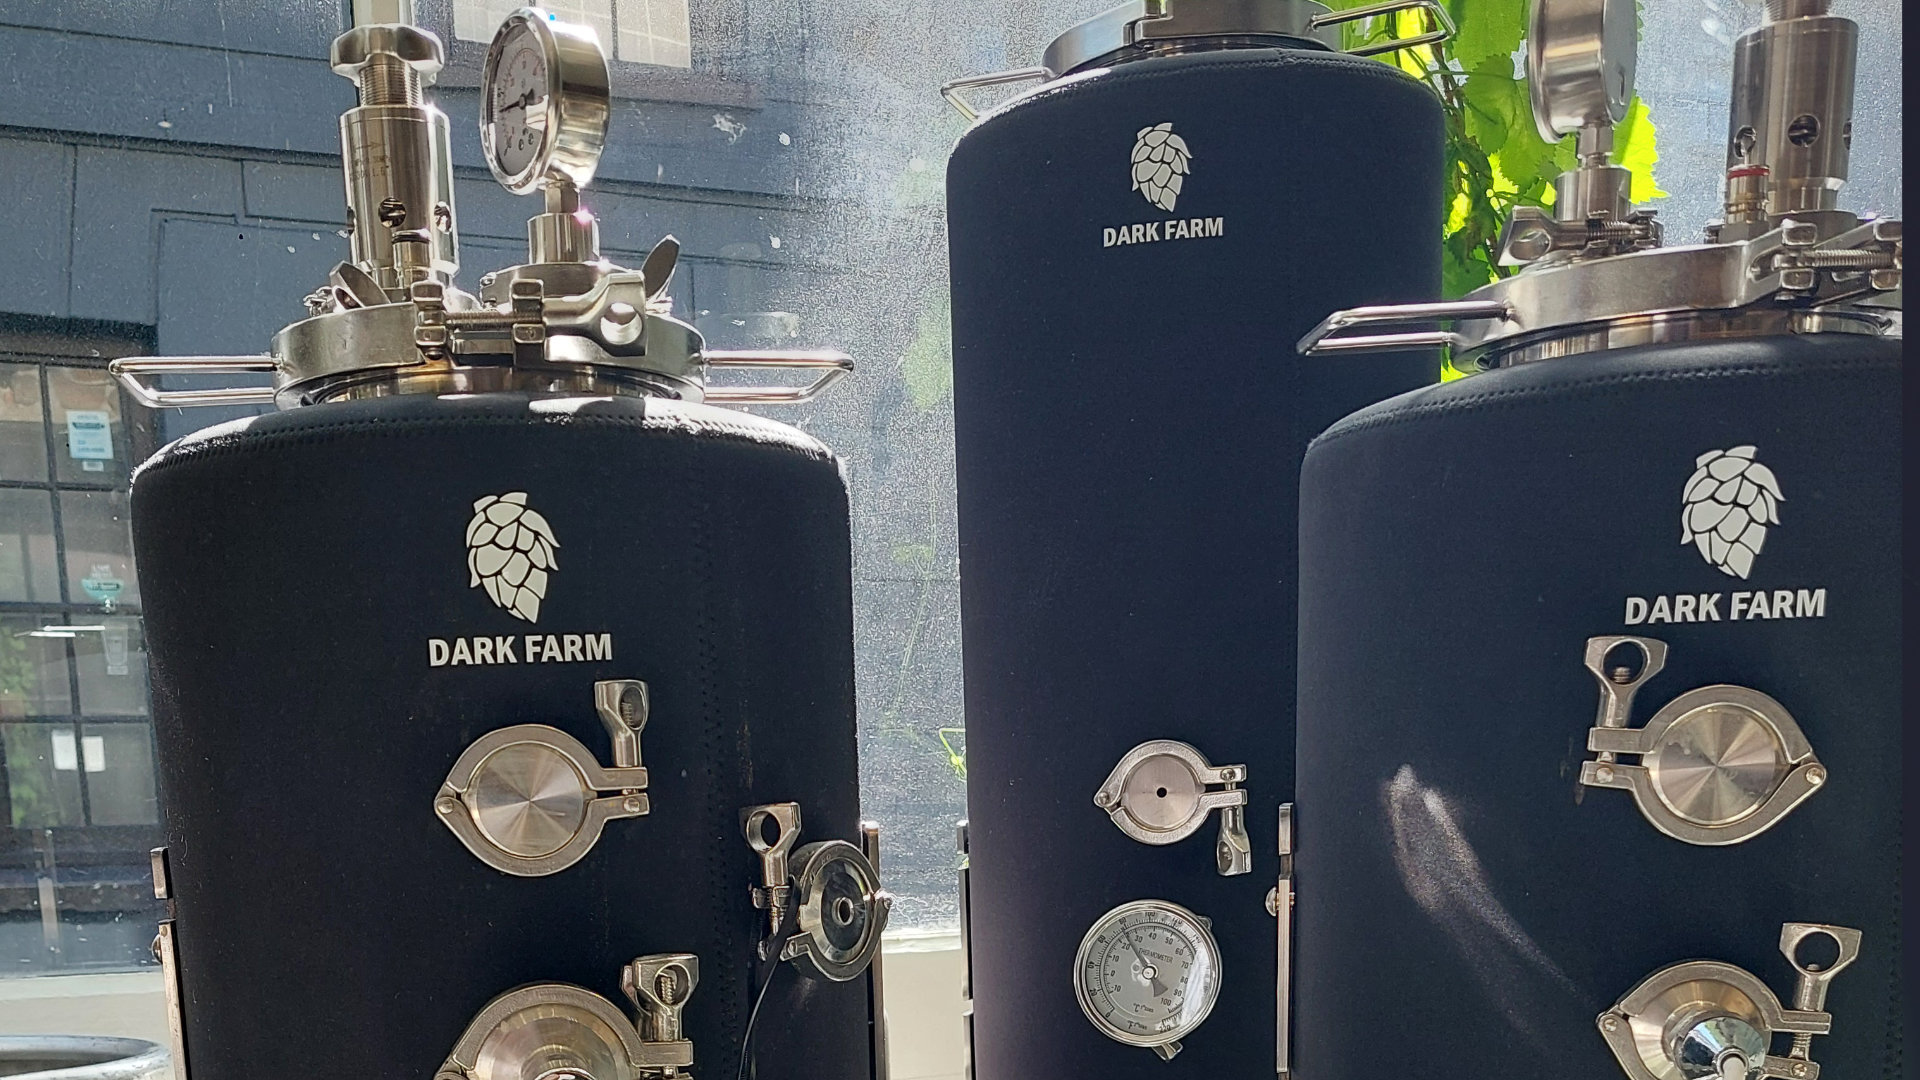
Getting into pressure fermenting can seem a little daunting but the process is relatively simple. And there are a number of products out there for all budgets. All you need is a vessel that can handle at least 60psi (which allows for good safety margins) with liquid and gas connections, such as ball lock fittings. Most importantly you need a spunding valve. These come in all shapes and sizes. A spunding valve is a device that usually has an adjustable valve, which you can set. Once the internal pressure of the vessel reaches its target value, the built-up gas is released.
It’s also helpful to have a sampling tap attached to the unit. This allows you to take your gravity readings during fermentation, if you can keep up with it.
Your liquid out can also be used to transfer your beer to a conditioning vessel. I would recommend a bubble float on your dip tube for this and an additional filter, just to stop any further particles that might still be floating around.

One final, vital point: when using a pressurised vessel remember it’s pressurised. I accidentally opened an outlet valve at 15 psi; needless to say I spent the next 3 hours cleaning beer off the ceiling and walls. A mistake you only make once - hopefully!
Curious To Try For Yourself?
Then you might be interested in our new 25L conical UniTank. It’s a compact, mid budget tank, and like all our equipment is made from stainless steel. It also has tri clamps fittings throughout, including a 6†fitting on the top for easy cleaning. The tank comes with an adjustable stand allowing you to fit it in a single height fridge, plus a neoprene jacket.
Like our Brew Tank, our UniTank has a selection of parts such as spunding valves, stainless steel and plastic options, cooling coil, sampling taps and many more. Check out our site for options. www.darkfarm.co.uk